Showing posts with label Wink Of Stella. Show all posts

February 10, 2018

Your Next Stamp - Guest Designer - February Blog Hop - YOU ARE EGG-stra...


Hello Stampin' Friends! Welcome to the Your Next Stamp February Release Blog Hop! Whoo Hoo! We are celebrating the new February Release and ALL the NEW Release products are available right now in the Your Next Stamp Store


After you do your shopping ;) be sure to hop along with us, leaving comments along the way for a chance to win a $25.00 gift certificate to the Your Next Stamp Store. The Winner will be announced on the Your Next Stamp Blog on 02/15/18!


And Karen is offering a discount in the Your Next Stamp Store too! SO EGG-Citing!

 photo Egg-citingBlogHop_edited-RS1_zpsqlxudqku.jpg 
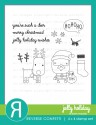
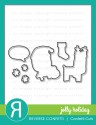
So for my February Blog Hop card I used the NEW EGG-Citing Stamp set and coordinating EGG-Citing Die set. I am SO ready for Spring, so it was a welcome break from the snow and cold to play with this SWEET set! I just have to say how much I LOVE the EGG-Citing Stamp set and the fun sentiments too.  

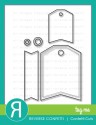
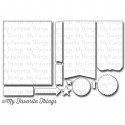
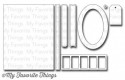
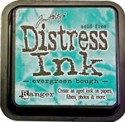
For my card I started by doing a little inking on a panel of Tim Holtz Distress Woodgrain Cardstock with Carved Pumpkin Distress Ink. The stitched horizontal panel is inked too but with Distress Oxide Inks Worn Lipstick and Fossilized Amber. I cut the YNS Open Scalloped Circle Die Set from paper that I inked with Distress Oxide Inks in Twisted Citron

 photo Egg-CitingBlogHopC_edited-RS3_zpshgprahgi.jpg

I stamped the egg carton from paper that was inked with the Distress Oxide Inks with Your Next Stamp Premium Dye Ink in Black Olive. I then cut the various little chicks and eggs, coloured them with my Copic markers, added a little touch of sparkle with my Zig Wink of Stella Clear pen and then adhered them to the egg carton.  I popped the egg carton up on the Open Scalloped Circle panel and embellished with green hemp cord and Pink Sparkly Gumdrops. I separated the sentiment and stamped the "YOU ARE EGG-Stra" (love this... reminds me of my daughter, Hannah, saying "Mom, you are SO extra"...which is true, lol) for the front of the card....

 photo Egg-CitingBlogHopE_edited-RS5_zpsy30yd4uu.jpg

...and I continued the sentiment to the inside of the card and added another egg carton with some more cute hatching chicks...the little guy that is upside down is just SO EGG-stra ;) 

Thanks SO much for stopping by and havin' a little look at my card with the EGG-Citing Stamp set and coordinating EGG-Citing Dies. Time to do a little shopping and then a little hopping for the February Release Blog Hop!


November 28, 2015

Reverse Confetti...FMS214 and Share Handmade Kindness # 4...Jolly Holidays


Hello stampin' friends! I spent the day colouring with my NEW ZIG Clean Color Real Brush markers. I just discovered these fabulous markers when visiting Jennifer McGuire Ink. Jennifer has two videos on her blog - video # 1 is an excellent product overview and in video # 2 she demos various colouring techniques to use with these markers. I was SO intrigued after watching Jennifer's informative videos, I order a set of 48 from Amazon and they arrived yesterday! I couldn't wait to get colouring! 

I coloured up a bunch of images from the Reverse Confetti Jolly Holiday Stamp set. It was a little bit of a learning process...trial and error. I need to practice some more for sure but I ended up with four images that I was pretty happy with. I turned the 4 coloured images into a card set with the great sketch that they have over at Freshly Made Sketches # 214. I'm also entering these cards in the Share Handmade Kindness - Week # 4 - Strangers.  
This sketch was perfect for making a set of cards! It is definitely one to use again!


 photo FMS214_edited-RS1_zpsgreaiefg.jpg

I stamped the adorable little reindeer from the Reverse Confetti Jolly Holiday Stamp set on watercolour paper with Jet Black Archival ink. I then coloured him by using the No-Water colouring technique as outlined by Jennifer in video # 2. I cut him out with the coordinating Jolly Holiday Confetti Cuts and popped him up on the card front.  

 photo FMS214H_edited-RS8_zpsknu6o5sp.jpg

I cut down a sheet of Tim Holtz Distress Water Color paper with a large stitched rectangle die from Blueprints 13. I then used Tumbled Glass and Evergreen Bough and blended them with my Ranger Mini Blending tool. I splattered the already inked background with some water as it reacts with the Distress ink and gives a very cool effect. I then splattered some Evergreen Bough splotches on the card too. 

I saw this fun and pretty Distress ink technique over at Laura's blog Doublestick Heaven. She used it on a beautiful holiday card and has a great video deoming the technique with lots of great tips...not only is she super talented, she's a hoot! 

 photo MFS214C_edited-RS3_zpshhckwfpm.jpg

Here is the second card with the little reindeer. I stamped the sentiment from the Reverse Confetti Leaping Lions Stamp set on MFT heavyweight Card Stock in Black Licorice with Sweet Tooth Pigment Ink and then heat embossed with AC Zing White Embossing powder. The fishtail flag banner is from the Tag Me Confetti Cuts and I popped it up on the card front and tied a little Hemp Cord around the one end of it. 

 photo MFS214I_edited-RS9_zpszrrhv6rk.jpg

I did the same Distress Ink inking technique on all the cards and this time I used Shabby Shutter and Mowed Lawn. I also added a few snowflakes from the Jolly Holiday Stamp set. I coloured them with the Light Blue and Turquoise Blue ZIG Clean Clear Real Brush Markers and then added a little sparkle with my Wink of Stella Glitter Clear pen

 photo FMS214K_edited-RS11_zpslqkdrgdf.jpg

Here are the next two cards in the set of four. This time I used the cute little Santa in the Jolly Holiday Stamp set and cut him out with the Jolly Holiday Confetti Cuts

 photo FMS214D_edited-RS4_zpsq0wsakae.jpg

I coloured up this Santa mostly using the No-Water Coloring technique but I did add a little water with my Zig Water Colour Detail brush to soften the shading I added with the Light Grey ZIG marker to Santa's beard and I used water to soften the colour on the sack of toys too. 

 photo FMS214F_edited-RS6_zpsehshpihn.jpg

I inked the background on the main panel with SpunSugar and Barn Door Distress ink

 photo FMS214E_edited-RS5_zpsjh6lumtf.jpg

This was the first Santa I coloured and I think his beard is a little too dark because I didn't use the water to soften and blend out the Light Grey marker. 

 photo FMS214G_edited-RS7_zpstmoop4bl.jpg

I used Shabby Shutter and Peeled Paint Distress ink for the background on this card. 

Thanks SO much for stopping by and having a little look at Reverse Confetti cards that I made for the Freshly Made Sketches Challenge # 214 and the Share Handmade Kindness Challenge - Week # 4


LinkWithin

Related Posts with Thumbnails