December 27, 2018

Reverse Confetti - Snowflake Magic


 Hello Stampin' friends! I am back with another card that I made with the NEW Snowflake Magic stamp set and coordinating Snowflake Magic Confetti Cuts from the NEW Reverse Confetti release.

I picked up some YUPO paper a couple of months ago with every intention of pulling out the many Ranger Alcohol Inks that I have kickin' around in my craftroom. I really wanted to make some beautiful marbled backgrounds that I have been seeing others make. So, I played around with the Alcohol inks and YUPO paper using various techniques...it is very fun, relaxing and addictive and definitely helped to got the crafty mojo flowing again.

This background was actually made by "smooshing" the YUPO paper in the residual alcohol ink that was left on my Ranger non-stick craft sheet. I added some extra little drops of Alcohol Blending Fluid to the left over Mountain Rose, Pool and Denim Alchol ink and Silver Mixative that was on the craft sheet to loosen it up and get some more movement of the ink. I loved how this soft marbled background turned out. It was perfect for a Snowflake Magic card. 


I stamped and heat embossed the Snowflake Magic stamps on MFT Heavyweight Cardstock in Berrylicious and Pink Lemonade with American Crafts ZING! White embossing powder.  I also cut some other snowflakes with the RC Snowflake Trio Confetti Cuts from Sno Cone and Pink Lemonade Heavyweight Cardstock.  I embellished with some hemp twine and YNS sparkly Gumdrops.


I finished up the inside of my card too...I simple added a scrap of the Alcohol inked marbled background cut with an MFT Horizontal Stitched Strips Die-namics (one of my all time favourtie dies along with the Vertical Stitched Strips....SOOOO versatile). I added a white embossed sentiment from the RC Sentimental Christmas Stamp Set and added another stacked Snowflake from the Snowflake Magic Stamp set and Confetti Cuts

Thanks SO much for stopping by and having a little look at my Reverse Confetti Snowflake Magic card!


December 25, 2018

Reverse Confetti - Simon Says Wednesday Challenge - Party Time...Snow Bunnies


Merry Christmas stampin' friends! I made some time to make a card with some new Reverse Confetti Stamps and Confetti Cuts. I am SO glad that I did! I realized how much I miss getting crafty and really enjoyed the creative process. I hope to get back at it on a more regular basis in 2019.  So for my card today I used the super cute NEW Snow BunniesStamp set, coordinating Snow Bunnies Confetti Cuts and the Snow Balls Cover Panel Confetti Cuts.   
For my card I used Reverse Confetti Card Stock in Cloud White, Aqua, Lime Green  and MFT Kraft and Sno Cone Cardstock

I am entering my card in the Simon Says Stamp Wednesday Challenge - Party Time! So for my card I envisioned the Snow Bunnies are having a FUN skate party ;)


So, I'm a slow poke when I am making a card so it really speeds up my creative process when I already have inked background paper on hand...just love when a card comes together (relatively) quickly. I found this inked background paper in my stash that I had made for another project and didn't use. The Bristol card stock was ink blended with Distress Oxide Twisted Citron and Peacock Feathers Inks. I cut it with the NEW Reverse Confetti Snowballs Cover Panel and layered it over a panel of Reverse Confetti Cloud White Card stock.

I coloured the skating snow bunnies with my copics, cut them out with the coordinating Snow Bunnies Confetti Cuts and created a little winter scene with the MFT Tree Lines Die-namics that I cut from a scrap of the same Distress Inked card stock. I also cut the stitched scalloped border from the MFT Blueprints 23. The larger cloud is from the Snow Bunnies Stamp set and the smaller matching cloud is from the RC/Simon Says Stamp Forest Friends Stamp set.


I framed the scene with the wonky stitched frame from the All Framed Up Confetti Cuts. I stamped a sentiment from the Snow Bunnies Stamp set on a stitched fishtail banner. I added some American Crafts twine and Your Next Stamps Gumdrops.


I finished up the inside of my cards...I stamped a shadow image from the Snow Bunnies Stamp set in Reverse Confetti Lime Green Ink and stamped a sentiment from the Sentimental Christmas Stamp set on Cloud card stock cut with the Tag Duo Confetti Cuts. 

Thanks SO much for stopping by and having a little look at my Snow Bunnies Christmas Skate Party card with the adorable skating snow bunnies.  I hope you all have a wonderful Christmas day with family and friends! 


October 14, 2018

Reverse Confetti - Color Throwdown #514, RC Stock Your Stash Challenge & Freshly Made Sketches # 358...Nuts About You


Hello stampin' friends! I made some time this weekend to make a card. I was inspired by the fabulous color combo that they have over at the Color Throwdown # 514 and I also used the great sketch that they have at Freshly Made Sketches #358. I stocked my Reverse Confetti Stash and used the adorable RC Nuts About You Stamp set for this friendship themed card, perfect for the RC October Stock Your Stash Challenge.   


I used Reverse Confetti Tangerine Cardstock and MFT Heavyweight Cardstock in Milk Chocolate, Kraft and Whip Cream


I created the watercoloured background with Fossilized Amber, Wild Honey, Brushed Courduroy, Aged Mahogany and Walnut Stain Distress ink using the "Smooshing" Technique. I cut the smooshed paper with the RC Stitched Rays Cover Panel. I layered the main circle panel by cutting the Chocolate Brown Heavyweight Cardstock with the Pierced Circle STAX Die-namics and Circle STAX Die-namics and I also used the Wreaths Confetti Cuts
   

I colored up the adorable little critters from the Nuts About You Stamp set with my Copics, cut them out with the coordinating Nuts About You Confetti Cuts and then popped them up on the trio of small circle as per the sketch.  I stamped a sentiment from the RC Most Beauty Stamp Set with Milk Chocolate Premium Dye Ink on the main panel. I embellised with some American Crafts Twine and Your Next Stamp Rainbow Sparkle Gumdrops


I finished up the inside of my card too with a sentiment from the RC Pattern Blocks Stamp Set and I stamped a shadow image of the squirrel from the Nuts About You Stamp Set. Thanks SO much for stopping by and having a little look at my card for the RC October Stock Your Stash Challenge,  CTD # 514 and FMS # 358.


September 08, 2018

Simon Says Stamp Wednesday Challenge - MFT Stamps & Spellbinders - Together Forever

Hello stampin' friends! just quickly stopping by to share another card I made for my friend, Glenda. She needed another wedding card. Again, I went for a more vintage/romantic look with the fall colour palette for the wedding. It was a great opportunity to use some of my paper flowers that I have been hoarding for years. I also used the MFT Stamp set LJD Together Forever for the sentiments. I am entering this card in the Simon Says Stamp Wednesday Challenge - Stamp On It.
I picked up the beautiful Oval Ironwork Nestabilites die set at my local scrapbooking store. Then I decided to pull out all my old Nestabilites Dies and I paired it with the  Nestabilites Labels Seven and the Deckled Oval Nestabilites. I cut some bronze metallic cardstock from my stash with the Oval Ironwork Nestabilites die. 

I stamped the sentiment from the MFT Stamps LJD Together Forever on MFT Whip Cream Heavyweight Cardstock with VersaFine Onyx Black ink. I cut the sentiment strip with the MFT Pierced Fishtail Flags Die-namics using the "cut and re-cut' technique to resize the strip. I embellished with paper flowers from my stash, twine and some brown half-pearls. 
I finished the inside of my card too....I stamped another sentiment from the MFT Stamps LJD Together Forever
Thank you for stopping by and having a little look at my card for the Simon Says Stamp Wednesday Stamp Challenge - Stamp On It with MFT Stamps and Spellbinders Nestabilites.

August 26, 2018

Reverse Confetti - Color Throwdown # 507 - Thank You Beary Much

Hello stampin' friends! I'm quickly poppin' by to share a card that I made today! It has been quite a while since I've made a card so I was happy to get crafty again! I was inspired by the beautiful colour combo that they have over at The Color Throwdown - CTD507 and some new Reverse Confetti goodies. I made my card with the Reverse Confetti Honey Bear Stamp set, Honey Bear Confetti Cuts and the Leaf Lattice Cover Panel Confetti Cuts

I used Reverse Confetti Cardstock in Grape Soda, Iced Aqua and Lime Green and MFT Heavyweight Cardstock in Whip Cream and Jellybean Green 


I created the background panel by inlaying the Grape Soda, Iced Aqua, Lime Green and Jellybean Green leaves into the negative panel cut from Whip Cream Heavyweight Cardstock with the Leaf Lattice Cover Panel. I also cut a frame from Whip Cream Heavyweight Cardstock with the All Framed Up Confetti.  

I stamped all the the various images for my scene from various RC sets Honey Bear, Rain or Shine and Coffee and You with Archival Brilliance Black Graphite Pigment Ink on Bristol card and then heat embossed with clear embossing powder. I then watercoloured the images with  ZIG Clean Color Real Brush Markers. I created the little scene with the Honey Bear layered on the Dashed Line Tag Confetti Cuts. The Sentiment is from the Reverse Confetti Bear Hugs Stamp set.  I embellished with some grape Twine and Grape sparkly YNS Gumdrops

I finished off the inside of my card too! Thanks SO much for stopping by and havin' a little look at my card for the CTD 507 with the Reverse Confetti Stamps and Confetti Cuts


April 29, 2018

Simon Says Stamp Wednesday Challenge - MFT Stamps - Together Forever


Hello stampin' friends! Whoo hoo...I finally made a card!!! It has been a couple of months since I have had any desire to make a card or get inky. I just didn't have any crafty mojo but that didn't seem to stop me from shopping at Simon Says Stamp, lol. Well, I am happy to enter my card for the Simon Says Stamp Wednesday Challenge - Anything Goes featuring MFT Stamps

My friend asked me if I could make a card for a wedding that she will be attending. It was just the nudge I needed to get off the couch, head down to my craft studio and get inky.


The colour combo for the wedding is Forest Green and Ivory so I used MFT Whip Cream and Kraft Heavy Weight Cardstock and Reverse Confetti Avocado Cardstock 


I did some 'smooshing" on water colour paper with Distress Ink in Mowed Lawn and Forest Moss and used the "smooshed" paper for the background paper and the Linked Chain Oval Die-namics. I cut several Linked Chain Oval Die-namics and adhered them together to give the linked chain oval die more stability and layered it over the Whip Cream Oval panel cut with the Oval STAX Die-namics and stamped the sentiment from the LJD Together Forever Sentiment Stamp set with VersaFine Onyx Black Ink


I cut RC Avocado Cardstock with the Stitched Rectangle Scallop Frames Die-namics and the Layered Leaves Die-namics was cut with Avocado Cardstock and Whip Cream Heavyweight Cardstock. I also added a few little Kraft hearts cut with the Full of Heart Die-namics. I used various paper roses and flowers from my extensive stash of flowers and embellished with some half pearls and Forest Green Hemp twine.


I finished the inside of the card with another stamped sentiment from the LJD Together Forever Sentiment Stamp set and layered the oval panel with another die Linked Chain Oval Die-namics. I added more paper flowers and more Layered Leaves. I printed the happy couples names on Whip Cream Heavyweight Cardstock and cut it out with the stitched fishtail banner from Blueprints 2.  

Thanks SO much for stopping by and havin' a little look at my card for the Simon Says Stamp Wednesday Challenge - Anything Goes featuring MFT Stamps. 


February 14, 2018

Your Next Stamp - February DT Dare - Fire Up the Fun


Hello Stampin' Friends! I am back joining the Your Next Stamp Design Team for the 
DT Dare, which means we are sharing more projects made with the stamps, dies and paper from the February release, plus we are giving away a stamp set! 

 So what do we have lined up for you today?  
Get ready to...Layer It Up! 

Now, head on over to the YNS blog for all the DT Dare details and leave a comment on the DT Dare post on the YNS blog for a chance to win a stamp set of your choice. A comment must be left by February 16th at midnight EST.  The lucky winner will be announced February 18th.

 photo DSCN1178_edited-RS2_zps1imvvqav.jpg
When I saw that the DT Dare was "Layer It Up" I was psyched! I LOVE lots of layers and I thought I could not only "Layer it up" but I could create a little scene too with the super cute new Fire Up the Fun Stamp set and Fire Up the Fun Dies. I mixed and matched various patterned papers from my stash and used the YNS Spring/Summer Scene Die to create the roads added some grass with the YNS Spring Grass Die and used the YNS Tree Trio Die Set.  

 photo YNSDTDare3_edited-RS3_zpscbxb0kup.jpg

I stamped a the sentiment from the Fire Up the Fun Stamp set with Colorbox Frost White Pigment Ink on a strip of Black Licorice Heavyweight Cardstock and heat embossed it with WOW! Bright White Embossing powder. I embellished with a sprinkling of YNS Grey Gumdrops
 photo YNSDTDare5RS5_zpsaukt3md5.jpg
I finished off the inside of my card too....I stamped a shadow image with Your Next Stamp Holly Berry Premium Dye Ink and added another white heat embossed sentiment form the Fire Up The Fun Stamp set. 

Thanks SO much for stopping by and havin' a little look at my Fire Up the Fun card for the February DT Dare...Layer It up! Please head on over to the Your Next Stamp blog and leave a comment for a chance to win a YNS of your choice.  


February 10, 2018

Your Next Stamp - Guest Designer - February Blog Hop - YOU ARE EGG-stra...


Hello Stampin' Friends! Welcome to the Your Next Stamp February Release Blog Hop! Whoo Hoo! We are celebrating the new February Release and ALL the NEW Release products are available right now in the Your Next Stamp Store


After you do your shopping ;) be sure to hop along with us, leaving comments along the way for a chance to win a $25.00 gift certificate to the Your Next Stamp Store. The Winner will be announced on the Your Next Stamp Blog on 02/15/18!


And Karen is offering a discount in the Your Next Stamp Store too! SO EGG-Citing!

 photo Egg-citingBlogHop_edited-RS1_zpsqlxudqku.jpg 
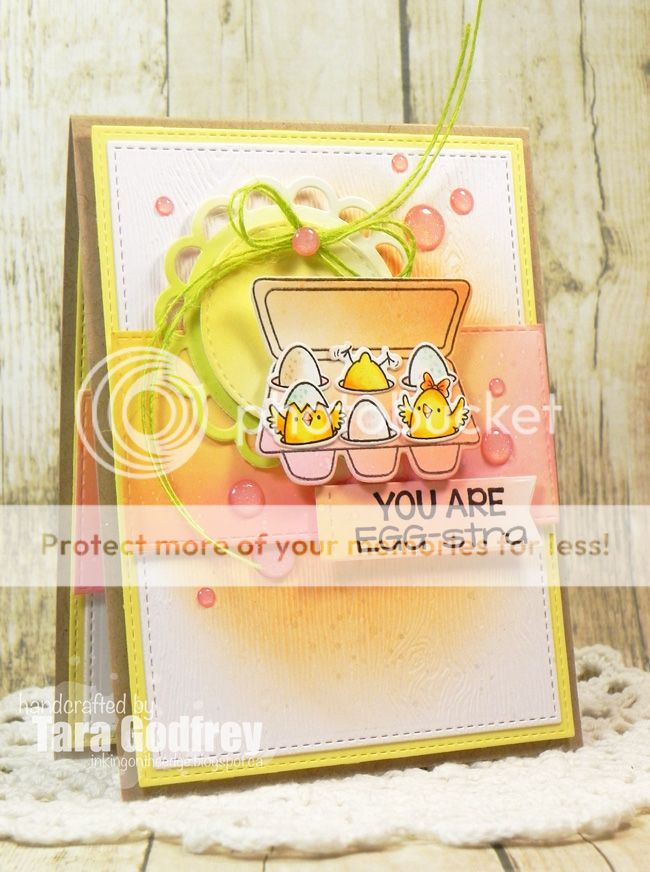
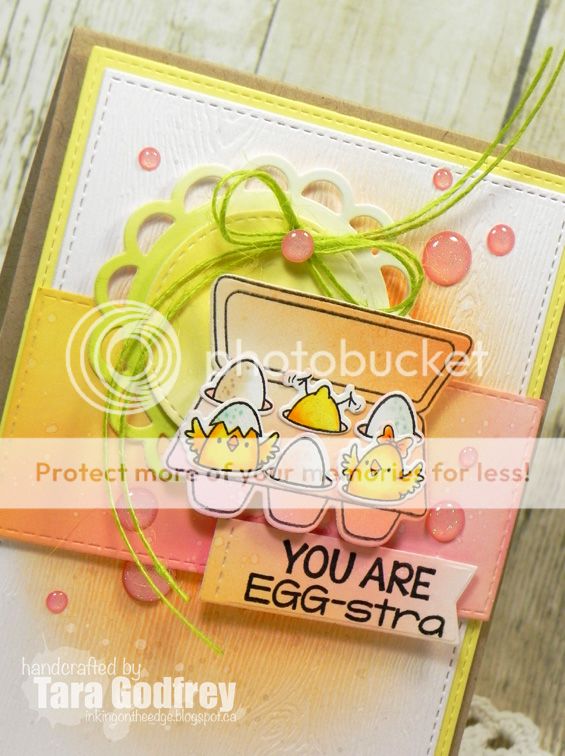
So for my February Blog Hop card I used the NEW EGG-Citing Stamp set and coordinating EGG-Citing Die set. I am SO ready for Spring, so it was a welcome break from the snow and cold to play with this SWEET set! I just have to say how much I LOVE the EGG-Citing Stamp set and the fun sentiments too.  

For my card I started by doing a little inking on a panel of Tim Holtz Distress Woodgrain Cardstock with Carved Pumpkin Distress Ink. The stitched horizontal panel is inked too but with Distress Oxide Inks Worn Lipstick and Fossilized Amber. I cut the YNS Open Scalloped Circle Die Set from paper that I inked with Distress Oxide Inks in Twisted Citron

 photo Egg-CitingBlogHopC_edited-RS3_zpshgprahgi.jpg

I stamped the egg carton from paper that was inked with the Distress Oxide Inks with Your Next Stamp Premium Dye Ink in Black Olive. I then cut the various little chicks and eggs, coloured them with my Copic markers, added a little touch of sparkle with my Zig Wink of Stella Clear pen and then adhered them to the egg carton.  I popped the egg carton up on the Open Scalloped Circle panel and embellished with green hemp cord and Pink Sparkly Gumdrops. I separated the sentiment and stamped the "YOU ARE EGG-Stra" (love this... reminds me of my daughter, Hannah, saying "Mom, you are SO extra"...which is true, lol) for the front of the card....

 photo Egg-CitingBlogHopE_edited-RS5_zpsy30yd4uu.jpg

...and I continued the sentiment to the inside of the card and added another egg carton with some more cute hatching chicks...the little guy that is upside down is just SO EGG-stra ;) 

Thanks SO much for stopping by and havin' a little look at my card with the EGG-Citing Stamp set and coordinating EGG-Citing Dies. Time to do a little shopping and then a little hopping for the February Release Blog Hop!


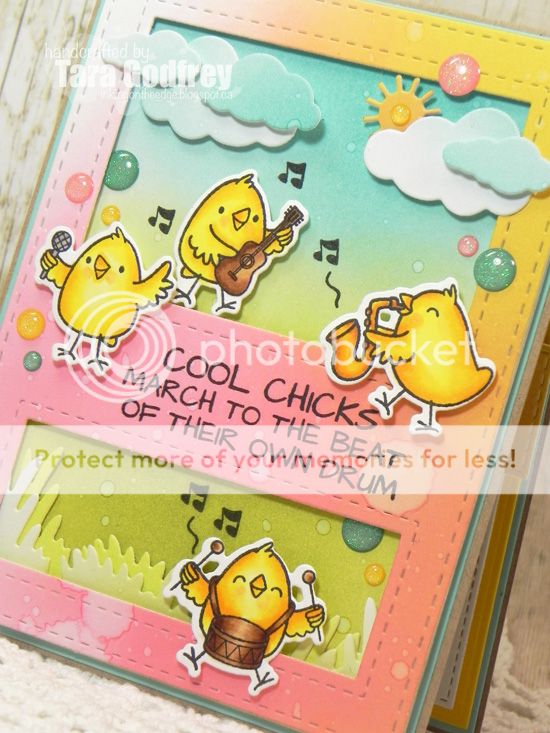
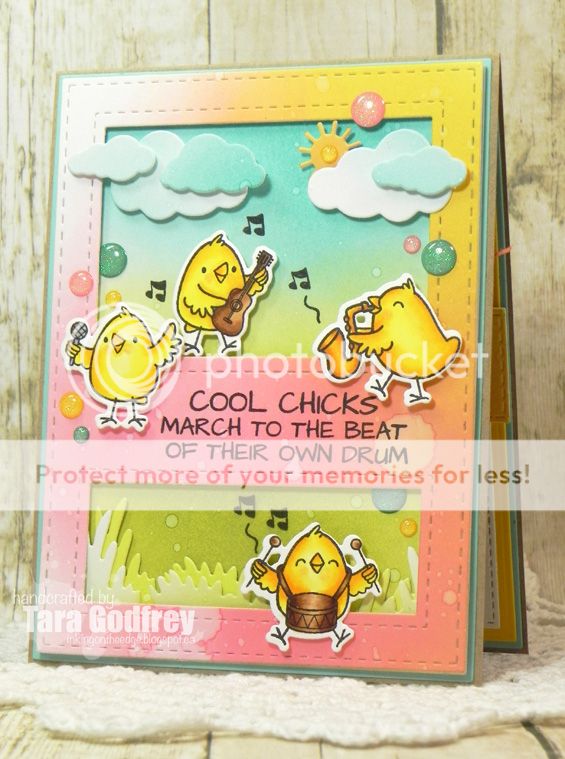
Your Next Stamp - Guest Designer - February New Release Preview - Music Chicks


Hello stampin' friends! I am beyond thrilled to be joining the Your Next Stamp Design Team as a Guest Designer for the February release! I am featuring the NEW Music Chicks Stamp set, the coordinating Music Chicks Your Next Dies and the fabulous Window Panel Die. Stop by the Your Next Stamp blog for a full list of Designer Previews with the February Release! 

Be sure to stop by again tonight for the Your Next Stamp Blog Hop and hop along with us for a chance to win a $25.00 YNS store gift certificate!

 photo PreviewMusicChicksD_edited-RS4_zpsiq9qdnak.jpg
I have been having a lot of fun with my Distress Oxide inks and used them to make a blended background for this card with a pretty spring colour pallet. I sprinkled on some water to the inked background to get those fun water splotches. I just adore the NEW Your Next Stamp Music Chicks Stamp setI coloured the various chicks up with my Copics, cut them out with the coordinating Music Chicks Dies and popped them up on the Window panel. I stamped this fun sentiment from the Music Chicks Stamp set with Your Next Stamp Premium Dye Ink in Black Olive
 photo PreviewMusicChicksB_edited-RS2_zpsnshon5jl.jpg
I really LOVE the NEW Window Panel Die...definitely a must-have...SO many possibilities and the stitched detail adds such a great finishing touch to the card. The grass is cut with the retired YNS Spring Grass die but you can get the same look with the Stitched Grass Die. If you've visited my blog before you know I have a serious addiction to YNS Gumdrops...I added a sprinkling of Magical Pastel Sparkly Gumdrops on this card.
 photo PreviewMusicChicksE_edited-RS6_zpsjgqcakol.jpg
I finished the inside of the card too....I used the Cool Tag set of Four Die Set and stamped another sentiment from NEW Music Chicks Stamp set and added another cute little Chick. 
Thanks SO much for stopping by and havin' a little look at my Your Next Stamp Music Chicks card for the February Release! See you again tonight for the YNS February Release Blog Hop